

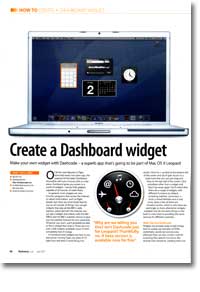
Create a Dashboard widget
- Article 38 of 89
- MacFormat, March 2007
Make your own widget with Dashcode - a superb app that's going to be part of Mac OS X Leopard
Page 1 | Page 2 | Page 3 | All 3 Pages
Of all the new features in Tiger, launched nearly two years ago now, the surprise hit has been Dashboard. Accessible with just a mouse click or a key press, Dashboard gives you access to a world of “widgets” – handy little gadgets capable of all manner of useful feats.
In general, most widgets are one-function gadgets that access the Internet to obtain information, such as flight information, but there are other kinds that let you do all manner of things. You can get widgets that play all the BBC’s radio stations, streamed over the Internet; you can get a widget that checks with the Met Office and the BBC’s weather service to give you the weather forecast for your postcode. Whatever you want, you’ll probably be able to find a widget that does it. There are now over 2,000 widgets available, most of them completely free of charge.
If Dashboard and widgets are new to you and you’re running Tiger, just press F12 right now and they’ll come flying into action. Click the + symbol at the bottom left of the screen and you’ll gain access to a load more that you can just drag and drop to the top half of the screen. Click anywhere other than a widget and they’ll go away again. You’ll notice there’s a range of widgets with different functions, by default, including weather, conversion, a clock, a virtual rolodex and a load more. Quite a few of them are Americo-centric, which is why there are seemingly so many alternative widgets available that do the same things as the built-in ones: they’re providing the same services for different countries.
Widgets are actually quite simple things: they’re usually just bundles of HTML, stylesheets, JavaScript and pictures, although they can also contain code for accessing Mac-specific functions. But despite their simplicity, creating them has typically been developer work. All that’s about to change, thanks to two new features in Leopard: Web Clip; and Dashcode.
Web Clip adds a new button to Safari: “Open in Dashboard”. This takes the page that you currently have open, launches Dashboard and creates a widget from the page. You can resize it, focus on part of the page, choose from one of several looks and then save the widget for use later. Then, whenever you bring up Dashboard, you’ll be able to view that page in your new widget. If you have a .Mac account and more than one Mac, you’ll be glad to hear that Leopard will synchronise your Dashboard settings and widgets between Macs, so you’ll be able to use your new widget, automatically, on any of your other Macs.
Being able to view a web page is quite a limited use of Dashboard though. Ideally, if you’re of a mind to create your own widget, you’d like to be able to make them do all manner of things, like read RSS feeds, give countdowns, do pretty graphics, monitors things, or plays podcasts or photocasts. That’s where Dashcode comes in. It’s like XCode, Apple’s built-in development environment, except for the rest of us. It’s designed to be easy to use – well, most of it anyway – just requiring a few simple operations to get a widget up and running.
Why are we telling you this? It’s just for Leopard, isn’t it? Thankfully, no. A beta version of Dashcode is already available, it’ll run on Tiger and you can download it for free.
To get hold of it, you’ll need to sign up to Apple’s Developer Connection (http://developer.apple.com). Despite its name, you don’t actually need to be a developer to join. If you’re not interested in getting advance versions of OS X on DVD, it’s also free. In fact, if you’re interested in getting the latest versions of Apple’s technical software, you should join anyway, even if you’re not interested in Dashcode, because you can download XCode upgrades and other tools as well.
Once you’ve signed up, you’ll be able to download Dashcode from http://developer.apple.com/tools/dashcode/. It’s a 19.4MB download, so you’ll probably need a broadband connection to get it, unless you’re very patient.
It’s worth mentioning at this point that since it is a beta, you’ll have to make a few allowances. For one thing, since you’re running it on Tiger, not all the features available in the Leopard version of Dashcode are going to be available in this version. Secondly, Apple would really like you to buy Leopard, so Dashcode will stop working after July 15, although any widgets you make with it should carry on working just fine after that. Lastly, there are a few bugs, here and there, that Apple will hopefully squash before the final version emerges so don’t forget to save your work frequently and keep back-ups. Apple is already aware of quite a number of bugs and if you plan to use Dashcode much and intensively, you should read Dashcode’s accompanying release notes, just to see if any affect you. In particular, things like Dashcode’s “Regenerate” button (see box out) and “Undo” don’t work quite the way they should at the moment.
Once you’ve downloaded and installed Dashcode, double-click on your hard drive icon, open the Developer folder and look for a folder called Applications. In that, you’ll find Dashcode. Double-click it to launch it.
When you launch Dashcode, you’ll be given a nice, friendly-looking window of choices. To start you off, there are eight different kinds of widget templates to start from. We did mention that Dashcode is designed to be easy to use, but parts of it can be complicated. Dashboard isn’t just for the rest of us – it’s also for any Apple developer who wants to create their own widget. That means that just below the surface, there’s a whole load of complexity, waiting to break out. In particular, some of the templates, because they access functions on your Mac, need some developer skills for you to take advantage of them. “Custom” gives you a blank page to start from, so shouldn’t be used unless you really know what you’re doing. “Gauge” creates a widget that can monitor levels of whatever you tell it to monitor; however, to do that, you have to be able to edit JavaScript to tell the gauge what to gauge, if you get our drift. Basically, if you understand what “document.getElementById(”gauge“).object.setValue(50);” means, you can use this widget type; if you can’t, you can’t, unless you fancy a little book/Internet learning. And if that sounds hard, move on immediately from “Quartz Composer”, since you’ll need Apple’s Developer Tools installed and a Quartz composition to manipulate.
The other five widget types are far better suited to most people’s purposes. “RSS” and “Daily feed” are ways to display the contents of an RSS feed in a widget; “Podcast” and “Photocast” do the same for podcasts and photocasts respectively; and “Countdown” gives a widget that counts down to an event – you can link it to an iCal calendar you’ve published as well.
Once you’ve picked a template type, the sheet will disappear leaving a window with the Dashcode widget project in it. At the top is the toolbar. Down the side are the project files and the widget workflow. In the main part of the window is the new widget. Floating on top is the Inspector, which helps when you want to customise the widget.
The workflow is probably the most important part of the window, since it gives you a series of steps you need to complete (or at least think about) if you want to produce a working widget. The workflow steps differ from widget to widget and in our walkthrough, we’ll show you how to use the workflow and take you through the steps needed to create a basic RSS feed widget.
If you want your widget to be something slicker than a basic widget, you’ll have to look at creating a widget icon and a “default image” for it, as well as a front and back. To show the front or the back of the widget, just click “front” or “back” in the project files list. The “default image”, which you can see by clicking on the “Default Image” section in the project files, is how the widget appears when you first load Dashboard or first install the widget. By default, all of the elements on the front of your widget except text parts are included in your widget’s default image. When Dashboard has finished loading the widget, it’ll show the front of the widget.
If you do decide to edit the default image, you should ensure that it has the same dimensions as the front of the widget, or else Dashboard will stretch it to fit. If Dashcode feels too limited, clicking “Open in External Editor” in either window will let you edit the current image in the default PNG editor. If you don’t give the widget an icon, it’ll get the standard widget icon in the Finder when you save it, although when Dashboard asks if you want to install the widget, the icon will be blank.
To make changes to any of the widget views, you’ll need the Inspector palette and the Library. Clicking on the “Library” button in the toolbar will give you access to your iPhoto library, iTunes and your movies, all of which you can drag and drop onto elements of the widget to change its look. The library also lets you add widget objects, such as text, movies, buttons and menus using the “Parts” tab, although you’ll need to be able to write JavaScript to make most of these items do anything. In general then, we’d recommend you stick to “text” objects and “shapes”, since these don’t do anything except look good. Some of the media parts, which allow you to add a QuickTime movie from an Internet source, for example, are also worth investigating once you gain confidence in Dashcode.
After you’ve added any more parts that you need, the Inspector palette lets you modify anything you’ve added to the widget as well as existing elements, so you can change their font, colour, stroke width, fill, et al. If you’ve ever used iWeb or iWork, it’ll all be very, very familiar.
When you’re done, click on Run to test your widget. It’ll launch without Dashboard, but you can use it just as you would a normal widget. If it works the way you expected, great: use the File menu’s “Deploy widget…” or “Deploy widget to Dashboard…” to create a widget from your project; depending on which command you pick, you’ll either be able to save the finished widget somewhere on your Mac or add it directly to Dashboard. If the widget doesn’t work as planned, you can go back and make any changes necessary to fine-tune it.
Dashcode is still in its infancy, but already, you can create a wide range of widgets, even if you have no programming experience. Now, if you can’t find a widget that does what you want, you can create one in just a few moments.
Page 1 | Page 2 | Page 3 | All 3 Pages